Tuesday, March 25, 2014

basement

I love when people ask me what our next project is! We are having a great time turning this small house into a great home that feels more like "us". Your interest and comments are very much appreciated.

 Thanks for reading our little blog!

We have a few things planned for the spring - Hello brown and beige trim/siding/gutters outside! - but for now we are getting to a few things that won't break our bank.

First up is our basement.

Once the stairs got their beauty treatment, the rest of the basement was looking and feeling a little drab and unloved. 


Yep. Drab and unloved. 

We have cleaned and straightened and organized it a few times since the great move in dump, but it is needing some real attention now.

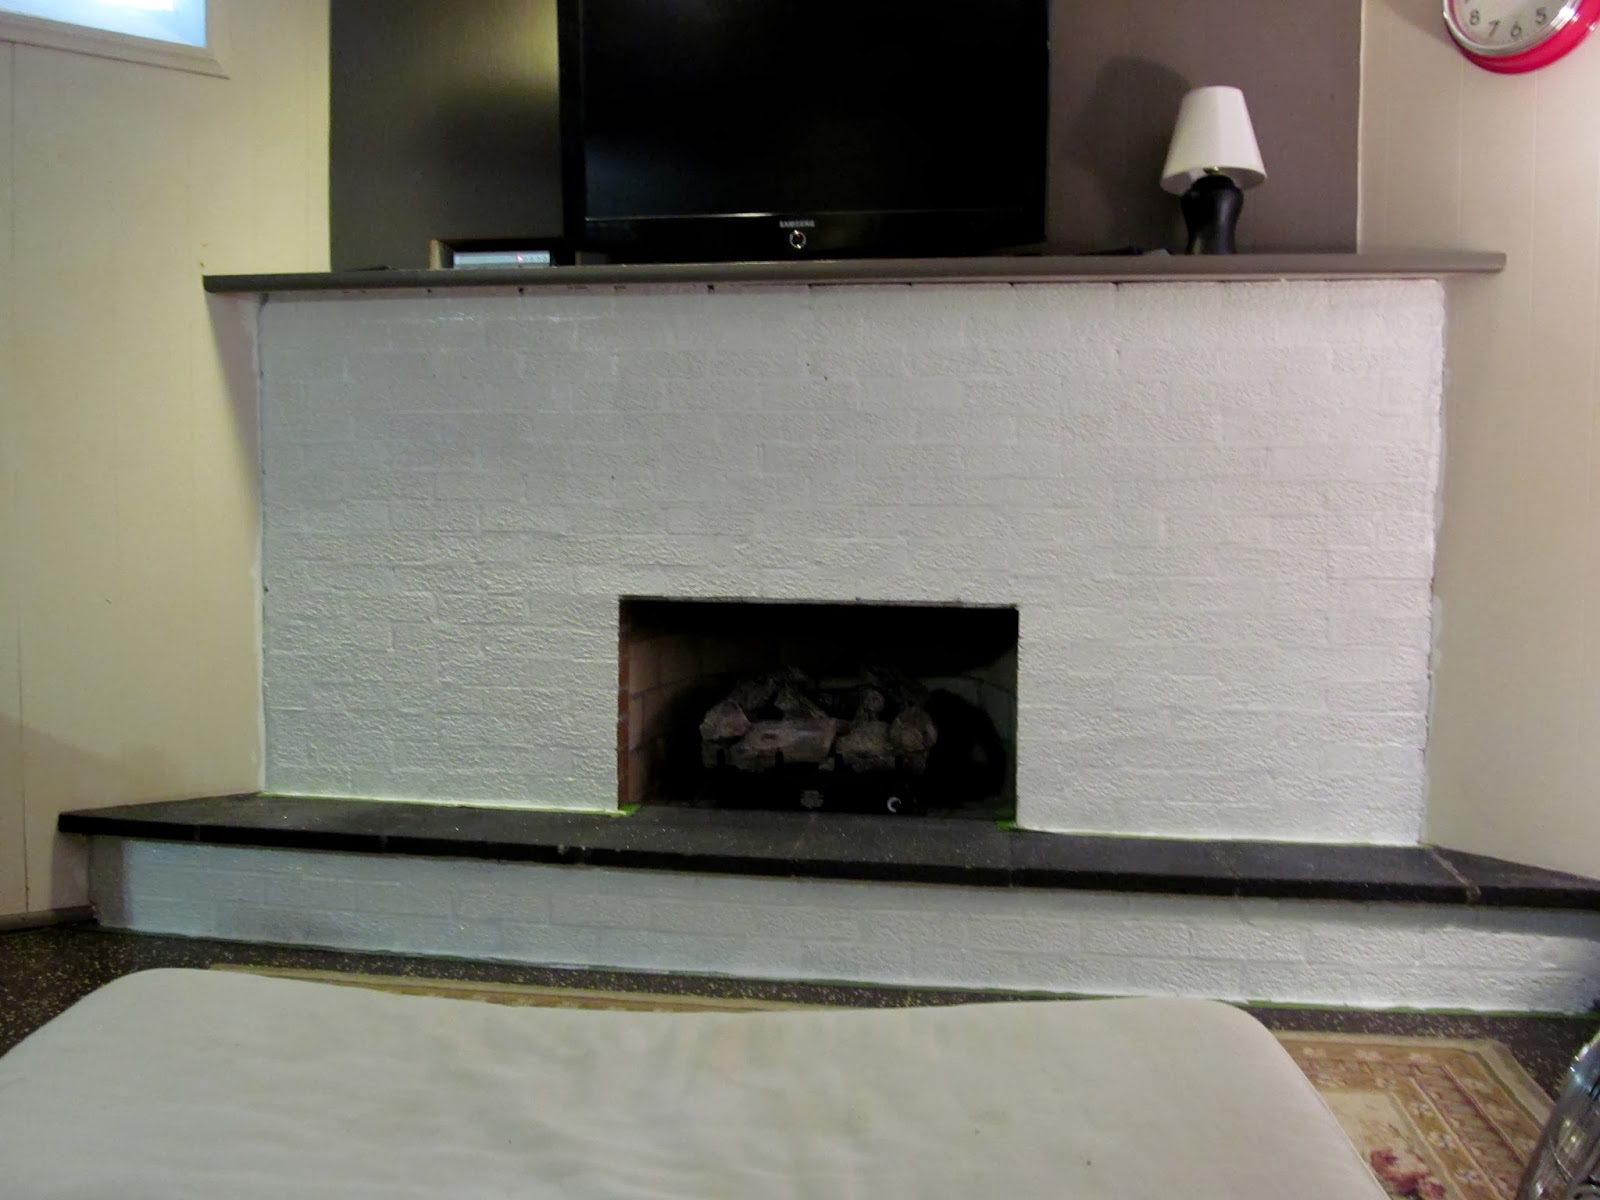
The first thing that needed to be undrabbed, was the corner fireplace.

We debated for a while what to do with it - white wash the brick, paint the brick a fun color, paint the mantle and upper wall a fun color.... You get the idea.

We did not love this color at all. 


We wanted to make the basement as light as possible. As is the case with most basements, we have only a few small windows for natural light. The bricks were light sucking. 

That revelation helped us decide that we wanted to cover them completely.


So out came the Kilz. It is recommended to use primer first if there is any staining from soot. We didn't want anything messing up our lovely paint job, least of all show-through black soot.


It covered like a champ. Yay!

But man was this stuff stinky! It is hard to ventilate in a basement. Even though this is a product for indoor use, it is potent. We had the little tiny window open with fans going and we still could smell it for a few days after. Fortunately one coat was enough.


Oh - So much better looking already!


The whole space feels lighter already.


After the primer dried for a week, we were so ready to get the rest of the basement brightened up. 


Part of brightening up the place, Hero tackled an unexpected (on my part) job with the existing lighting. 

For whatever reason, there was a recessed light in a super awkward spot right in front of the fireplace wall. Not only was it thisclose to the TV, but it looked like a 6 1/2 watt bulb, it was so hidden up in the ceiling. (Take my word for it.) So Hero moved it to a better location and replaced it (and it's brother) with a much more efficient recessed light. Sorry, no photo of those.  But they are just like the ones in our kitchen.)

The problem I was in charge of fixing is how to patch the hole. 

Ugh.

I'm not a huge fan of the textured ceiling, but it is what we were working with. It actually wasn't as hard as I thought it would be. Once I gave up on the idea that it would match perfectly, I was free to be creative with the plaster patch stuff. 


It actually didn't turn out too bad. 

Good. Moving on.


See the gray spot on the ceiling just above Hero's right hand? That is the patched area. Once everything was painted it blended in just fine.

We decided to paint the entire place the same color. The fireplace, the ceiling, the walls and the trim. It is Bistro White (Valspar) and is the same color as the trim and ceilings in the rest of the house. 

We did flat for the ceiling, satin for the walls and fireplace and semi-gloss for the trim.

(You can see the old color on the right of the fireplace. Not the worst ever, but compared to the clean white, so drab. Not sure why we waited until actually painting that wall to take the clock down though.)


Between Hero and I, we had two trays going at all times. He usually does ceiling and I usually do trim. And we share the walls. We just kept rotating what we were doing and switching up trays, rollers and brushes. Amazingly we did not get anything mixed up.


We love it! It all looks so clean and bright. With everything the same color, the space really opens up. We needed that since there are so many different things going on - three slightly different ceiling heights, corner fireplace and a post right in the middle of the room.

After we got done painting, I swept and mopped and dusted. I washed the slipcovers on the couches. I sewed a few new pillow covers. I edited out some things and accessorized. We actually have stuff up on the walls, too, to make it feel much more "Murphy". 

Not too much stuff though.


Before.


And after.

We spend a lot more time down here now. It is so cozy with the fireplace - Hero hooked up the gas and it warms up so nice. And the couches are so comfy for snuggling and taking little naps.

For the cost of some paint and a few lights, we are really happy with the way our basement got a new look.

signature photo teresasig1.png

Thursday, March 6, 2014

armoire

A few months ago I got a group email from a friend who was trying to find a new home for a TV cabinet their family didn't want anymore. I immediately thought my daughter would like it. (Remember she and her family just moved to Michigan). She gave me the go-ahead to claim it for her.

And then she decided that she really didn't think she could use it.

I didn't think I wanted it, because, you know, we are getting rid of stuff, not accumulating stuff. But the more I thought about it, the more I realized this cabinet could be just what we need to replace the cheap, open bookshelves we have had forever. (Not that there is anything wrong with cheap, open bookshelves. Ours were just looking super worn and sad. And very old.)

Once we got it home I realized this was going to be perfect!


Our friend made this while he was in high school. It is oak and heavy and really well constructed. 

Holy cow. We had him autograph the back - He may be famous some day. 


Such a great armoire!


I have always wanted an old armoire. They are so versatile and full charm.

This thing is deep. Remember when TVs were huge and you needed a big furniture to fit them? Luckily, I didn't want to use it for a big old TV.

But, it needed just a little tiny bit of help to make this a little more "us".


First up - a layer of paint. 

The stained oak with brass handles was very popular and such a great look for the 80s and 90s. I probably would have loved it then, too. But I want to make it look like it's been around a lot longer than that.


After one coat.


And the second coat.

See the edge of the bookshelf on the left there? Sorry I didn't take a full on photo. You will just have to believe me that they are a wreck.


Looks so different already! I just love painted furniture.


And, now it's a different color.

I got this great color at Lowe's. I tried to get a sample photo of it, but I could not figure out how to get just a photo of the color. 

But you can see it is a muted blue-gray color that I thought would be pretty terrific. And it is.

I wanted it to look like it's been painted several time over the years. So that is why I did the two coats of white first, and then the two coats of the blue-gray. I could have gotten really crazy and done even more, but I was getting a little too anxious to put this thing to work.

I actually made this color into chalk paint, following this tutorial.


Chalk paint finish is very matte, which means it has no shine at all. In fact, it almost looks powdery. It is such a cool finish for something that you are trying to make worn and loved. And it distresses really well. If you want to sand the edges and scuff something up a little to make it looked a little bit aged, this is a great paint for that. Straight latex paint sometimes peels instead of sanding off in a more natural looking way.


Can you see that edge there? See the white paint peeking out a little? Just what I wanted.

Another great thing about distressing a piece, besides the awesome patina you can get, is that you don't have to worry about future scuffs and scratches. Any natural wear just adds to the charm!


Got the doors and drawer fronts all painted up, too.

(Another accidental shot of the book shelves that will soon be in a garage sale.)


I dropped this door while prepping it. See the little crack at the joint? The door is put together so well that it didn't even loosen, but it did add a little character when the paint cracked. So glad I don't have to freak out about that imperfection. In fact, I like how that happened.


When using chalk paint, a wax rub is a great idea to get a protective coat. This wax is clear, but there are darker ones that looks like a light stain that also add a cool subtle, antique-y look.


But here's how the clear looks. Just brings out the color a little, kind of like when a plain rock looks a little fancier when it gets wet.


You just swirl the wax around with a rag, and then buff it with a soft cloth. Piece of cake.


The one on the left is waxed. See the difference? It's nice and subtle. 


You can see how the light reflects off the waxed finish. The wax makes it look done.


Hero cut a board for one more shelf. Clearly not the same caliber of wood - oak versus particle board.  But since I am painting it and putting it behind closed doors, it works just fine for us.


Something else that really helps in creating a different look is new hardware. I found these awesome knobs at Hobby Lobby - 50% off, of course.

(I kept the same hinges - just painted right over them. No big deal.)


All done. I love it! 


Looks really different now


And it holds a ton. I got everything in plus a little more. 

We love it.

Thanks Matt and Stacie.

signature photo teresasig1.png