Tuesday, November 3, 2015

finished bathroom!

Hi!

The bathroom is about 94 1/2% done and we are so dang happy with how it turned out.

It is a completely different room. And that is a good thing.

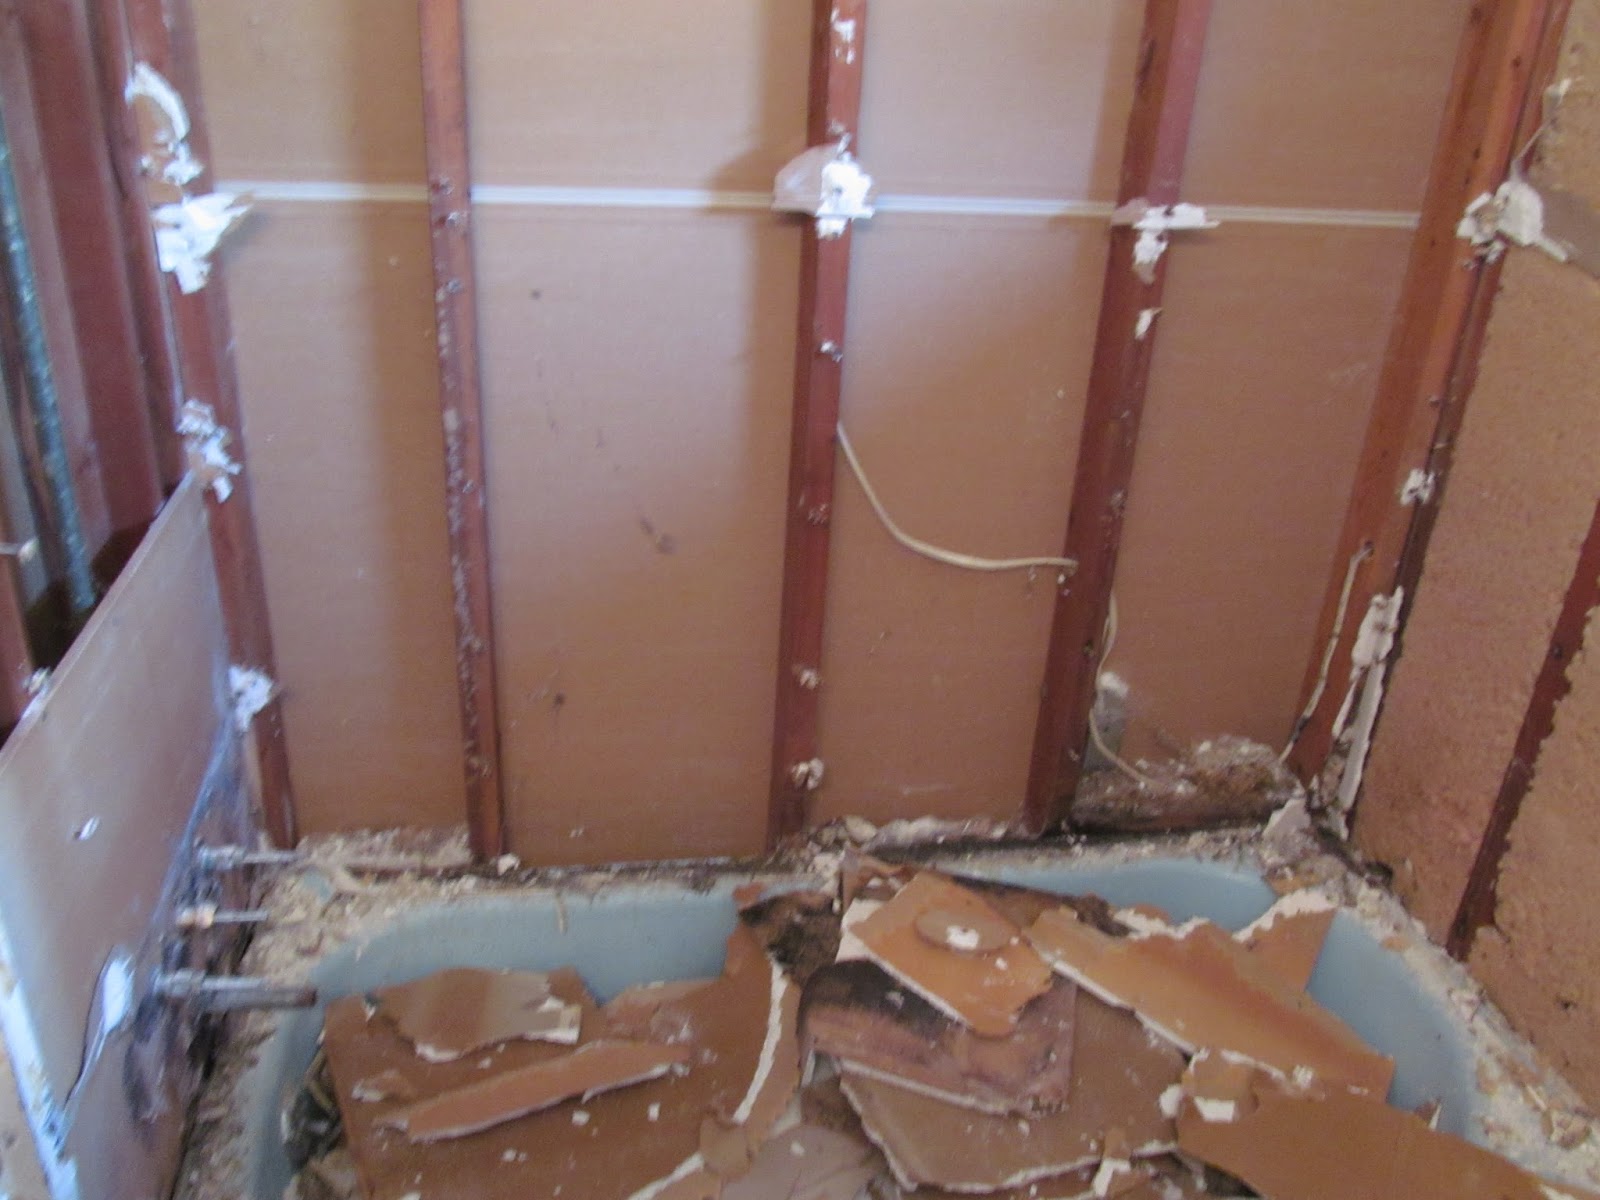
Here is where we started:


Truly - there are no words.

I don't mean to sound ungrateful. We, of course, are all super grateful for having a bathroom. This was very functional and it totally did the job. But honestly, when the soap dish started going loose, I was cheering on the inside. 

And here is what we are loving today:


WE LOVE IT.

Oh my goodness. We are over the moon with this bathroom. 

We spent a few crazy days getting most of this up and running and have taken a few more weeks to finish up a few things. We still have a few minor things to finish up - caulk around the tub and toilet and create a shelf situation above the toilet - which we hope to get done in the next few weeks.

Isn't it funny how once the bulk of a project is done, those little things can linger forever undone? We knocked a bunch of those little undones out of the way already. And we are determined to get the last two things off the list and call this remodel done done.

How about a tour?


We are in love with these drawers in the vanity. They are such a great storage option - Way more efficient than cupboards can be that might eat stuff in the back of them. Love these.


This vanity and sink top are from IKEA. I love the all in one top - super easy to clean. Love this.


Standing in the shower - Good view of the plank wall and the great lights. Love these.


A friend suggested I use a potato chip tin for a trash can. Love that.


Great view of the floor and the new toilet. Love these.


The shower and tub are a piece of cake to clean. Love that.


We have a new shower head, faucet and handles that are not hiding decades of who knows what kind of nastiness. Love that.


We used little tiny planks on the edge of the little tiny wall that houses the water pipes. Love this little tiny detail.


Hero built new shelves for the closet. They fit the space, unlike the previous ones. After some paint they look awesome. Hero also put a plug in there so we can keep our toothbrush charging without having it hanging out on the sink. Love this.


Cute basket to hold extra toilet paper, place for extra towels. Open shelving can totally work and be great looking. Love this.


Here you can get a good view of the plank wall.

Did you notice something kind of fun in that photo?


It's a little more obvious here.

As much as we were ready to move our bathroom into a non-1958 blue existence, we just felt like we could honor it's heritage in this small way. 

The one thing that was never blue is now painted blue.

Hmmmm. What were we thinking?

That we love it.
 photo signature.jpg

Wednesday, October 21, 2015

new bathroom walls

I am super excited to share this part of the project, because this is where we start moving past destruction and hauling and messy, and move into installing and adjusting and finished!

But first let me show off the floor a little bit better. I knew I had taken a crappy photo of the floor, but there is really just no good way to show off this floor pattern. 

But here is another attempt:


It's pretty simple (what we wanted) with just a little bit of sparkle (which we didn't know we wanted but now kind of like). I know - You cannot see the super fine glitter. Trust me - It's there. Just enough to be a little sassy.


Because we were planking the walls and planning to space the boards with a tiny gap, we first painted the drywall (original!) white, just in case there was some show-through. Plus, it felt good to get everything on the same page (meaning white).


Here is what we covered up with the planks:

Giant opening from original medicine cabinet.
Old not centered light fixture hole above the mirror.
A really icky finish on the walls - not sure what happened with them over the years, but the paint we painted just a few years ago was already flaking off. 


So to add some charm and solve so many issues, we are planking!

We used the same type of boards that we used for our kitchen floor. We love the farmhouse-y look and totally wanted to plank a wall somewhere in our house. This is just the spot!

(We also planked the two half walls that formerly hosted blue tile.)

Hero got his level out and we had lots of fun getting these boards up. We used dimes to put between the planks as spacers (nickles were too chubby) and we developed quite an efficient system. 

I just love working with that guy.


And he lets me use the air-nailer gun. 

At every stage as we install something, I think to myself - "This is my favorite thing!". Seriously, this bathroom has so many great elements now!


Oh - So in love.

Next post = Bathroom reveal.
 photo signature.jpg

Monday, October 12, 2015

day 2 - part 2

Hi!

Have I mentioned how much we are loving the new look that our bathroom is sporting?

So. Much.

The floors and walls were next to go in. 

And let me just say, Hero and I are not the type of people that have every detail figured out completely ahead of time. In fact we are pretty much the poster children for the "fly by the seat of your pants" movement. We have a general idea, but we really don't have a clue until we actually get in there and see what is what. As we've gotten older and (wiser?) we have gotten a tiny bit better at planning. But lots of our conversation during projects are something like this: 

"Okay, what next?" 
"I don't know. What do you think?"
"How about _____?"
"Sure!"

Sometimes this is called adventurous. Sometimes it is called irresponsible. 

We like to be more positive. We are definitely adventurers.

This bathroom project is no different. After the tub and shower were up and running before 1pm, we had lots of daylight hours to get going on the rest of the bathroom.

But of course, bathrooms need floors and walls before you can install toilets and sinks.

Here is where we left off on the floor:


What we needed next was a template to cut out the vinyl flooring we picked out.

Wait - I forgot to tell you - We had to buy a new floor.

Remember the vinyl flooring we have had leftover forever from the big house (and made our budget lower)? It would have been perfect - Except all those years rolled up had left it with major dents that were unsmoothable.

(Secretly I am not too sad because while it was fine, I was not in love with it.)

So I ran out to Lowe's and found nothing.

Then I went to a fancy flooring shop and told my salesperson the size I needed and that I had to walk out of the store with something right now. He took me to the warehouse to the remnant section (lucky we have a small  bathroom!) and I found a really great piece for just $50. 

Yes please!

So, back to the template. Here is where Liam helped the most. He gave us some old math homework pages to tape together to make the exact cut-out for the floor.

His comment:

"Finally, a real life use for math."


After this fun art project we taped it to the vinyl piece and cut it out.

Just as it is hard to cut holes in a brand new tub, it's hard to cut a brand new piece of vinyl floor.

But we did it. Obviously.


Because we are working with such a little space and we would have a toilet and a vanity to hold it down, we only used adhesive around the edges. 

And in case you are wondering, this is what I wore out of the house to the fancy flooring store :)


Hero modeling the new floor.

This floor is a little challenging to see (especially this photo - I will try to get something better). It is a speckle-y gray, white, gray-green color kind of thing with very fine glitter. 

Hmm. That does not sound very attractive. Trust me, it's good.
 photo signature.jpg

Wednesday, September 30, 2015

day 2 - part 2

Hi - Back to catch you up on the rest of day 2

Here is where we left off - tub and walls out and sub-floor in. And Hero working like a crazy to get the tub and shower up and running before we go to bed.


We had a heck of a time finding a tub that would fit into this tiny spot that did not cost a million dollars. Hero found this one from Menards:


We wanted to go with something that had very little chance of water leakage. And something that was very easy to clean and maintain. And inexpensive. And we could put it in ourselves.

And of course we wanted it white.

And this fit the bill perfectly.


Hero put took that tub in and out about 24 times to make sure where it would sit and that the drain would line up. He also measured at least 13 times to cut the hole for the faucet. 

Cutting holes in brand new tubs is not an easy thing to do.


But he drilled the hole and put that sucker in one last time.

Oh, and the water lines are in, too. And the drain pipes. And the insulation.


Next up, the walls.

Let me just take a second here to tell you how stinkin' excited we both are about this new set up. No grout to clean. It's white. No wonky soap dish that may or may not be harboring nasty bacteria. It's not blue. It's fresh and clean.

We are so excited. Super excited. 


Doesn't it look this thing is not going to fit in this space? Yeah, it looked that way to us, too. 

At this point is was about 10:30pm.

We didn't make it, darn it all.

Hero took himself to the gym to take a shower and then we dropped into bed after about a million hours working that day.

(Day 3 - part 1)

The next morning Hero popped this thing in and out about 24 times, also, to make sure how it would fit onto the tub and measured where the handles would line up 13 times. 

More holes to drill in brand new things.


And before we knew it, it was done.

Wait, what?

The wall part just clicks right on once you have sweated through prepping it. Pop in a few screws, turn on the water and we were in (sort of) business.


Liam was able to take a shower before he went to work that afternoon.

Oh, yeah.
 photo signature.jpg

Tuesday, September 22, 2015

day 2 - part 1

Day two was very full. 

Hero was up at the crack of dawn and worked until about 9:30 that night. It would take you that long to read this if I didn't break it up.

Remember I showed you the whole reason for this renovation moving to the top of the list?


This soap dish that was letting loose from the wall that should never have let go, the way this bathroom was built like a tank. 

Probably some kid stood on it at some point in the last 60 years. I know I used to do that when I was a kid.

Hero popped that thing off like nobody's business.


Oh boy.

This is what was lurking back behind there. Yuck.

That blue tile, so innocent looking, was covering this up. 


Once Hero got all the tile down, we could really see the extent of this nastiness.

Holy Cow. So gross.


Fortunately, the mold from the water damage was mostly limited to the drywall. Once that was removed, and we got a good look at what was back behind that, there really was minimal mold.

Good thing.


This all happened while I was gone for a few hours. Once Hero gets going on something, it is pretty hard to slow him down.

Um, That thing weighs about a million pounds.


Hero had it strapped to the dolly and out the door before I got home. He later hauled it off to the scrap yard and got eight bucks for this bad boy. 

Better than paying to dump it.


What a stinkin' mess back there. All that 60 year old insulation and yuck got sucked up and things looked soooo much better. 


This little strip of tile was all that was left of the blue after that tub was out. We joked about leaving it as a shrine to the bathroom that was (since it was in pretty good shape), but then we popped those off the wall in about 3 minutes.


We installed new insulation (after treating the mold) and a new sub-floor. Next up we start adding things back in.
 photo signature.jpg

Thursday, September 17, 2015

bathroom day one

Hi there - Happy Back to School!

Boy have we been busy.

It has been a crazy last few weeks since I last checked in (and showed off the non-blue wall in our bathroom). Here is the update on that room:

While waiting on Hero, I got busy with the planks Hero had cut at Lowe's. Did you know Lowe's will cut any wood you purchase there? It is free for the first 5 cuts, and 25 cents each after that. So worth it.

Did I tell you what we are going to do with these planks? (Remember we used planks for our kitchen floor.) This time around we are going to use them on the walls!

Here they are stacked up in the garage ready to go.

That is our toilet back there. I'll give you one guess as to what color it is :)


I primed these before we brought them in the house. Even though there are primers that are labeled "interior", you have to have a ton of ventilation using it. (We learned that the hard way - what a stink it makes.) Outside is a ton of ventilation.


And drying. 

I just love our Sesame Street paint sheets. These are from when our boys were little. So many memories of snuggling with books, toys and blankets with those little ones. Now it's great to paint every now and then and go down memory lane.


Hero had waited long enough to get going on this project and as soon as he got home we got right to work. The plan was something like this:

Day One after work - prep the planks, rip out walls, floor, vanity and toilet.

Day Two (Hero had the day off) - rip out tub and shower walls and install the new ones.

Day Three - install walls, floor, vanity and toilet.

Day Four (Which happened to be a Sunday) - take a break. (We love the Sabbath - What a great blessing it has been in our lives to obey this commandment. Sometimes it may seem counterproductive, but we have always had faith that when we give the Lord His day, all the rest of the days go much better.)

Day Five and Six (a few more days off) - finish up with lights, mirror, trim, etc.

So this is what Day One looked like at our house:


The walls under the tile had a double layer of drywall. Hero was able to salvage the first layer and not have to replace it. It's the little things that make projects go better, right?


See Hero sitting down, looking like he is doing something with the water lines? You will note from above, that fiddling with the water lines is not on the Day One plan.

Change in plans - A water line got nicked. 

Dang.

Add to Day One: Turned off the water to the house, run to Lowe's to get a replacement line, repair the water line, turn the water back on.

As most projects have their unexpected moments. we should not have been surprised that just when things seemed to have been going along swimmingly, this little hiccup happened.


Look at those walls and that floor! Not the final look we are going for, but so not blue. 


Right on schedule for Day One, even after the water line side project.

We are so excited to finally renovate this bathroom - It is a long time coming bringing this room out of the 1950s.

More updates coming soon!
 photo signature.jpg