Friday, July 26, 2013

Kitchen Floor Part Two

You know how sometimes you have a plan for a project and get all excited and you do the research and figure out how it can work for you and buy all the stuff and get started and then wonder if it's really going to work out?

This is that kind of project.

But we have learned that lots of times things look worse before they get better. So if you ever find yourself in the middle panicking, just hang in there. Don't ditch - Keep going!

Since we had the wood cut at Lowe's, we were really committed before we even purchased the lumber.

Here is where we left off:


Things were moving right along. Working towards that dream floor. 

It just looked a little not like what we had in mind at first.


But we got our groove on.


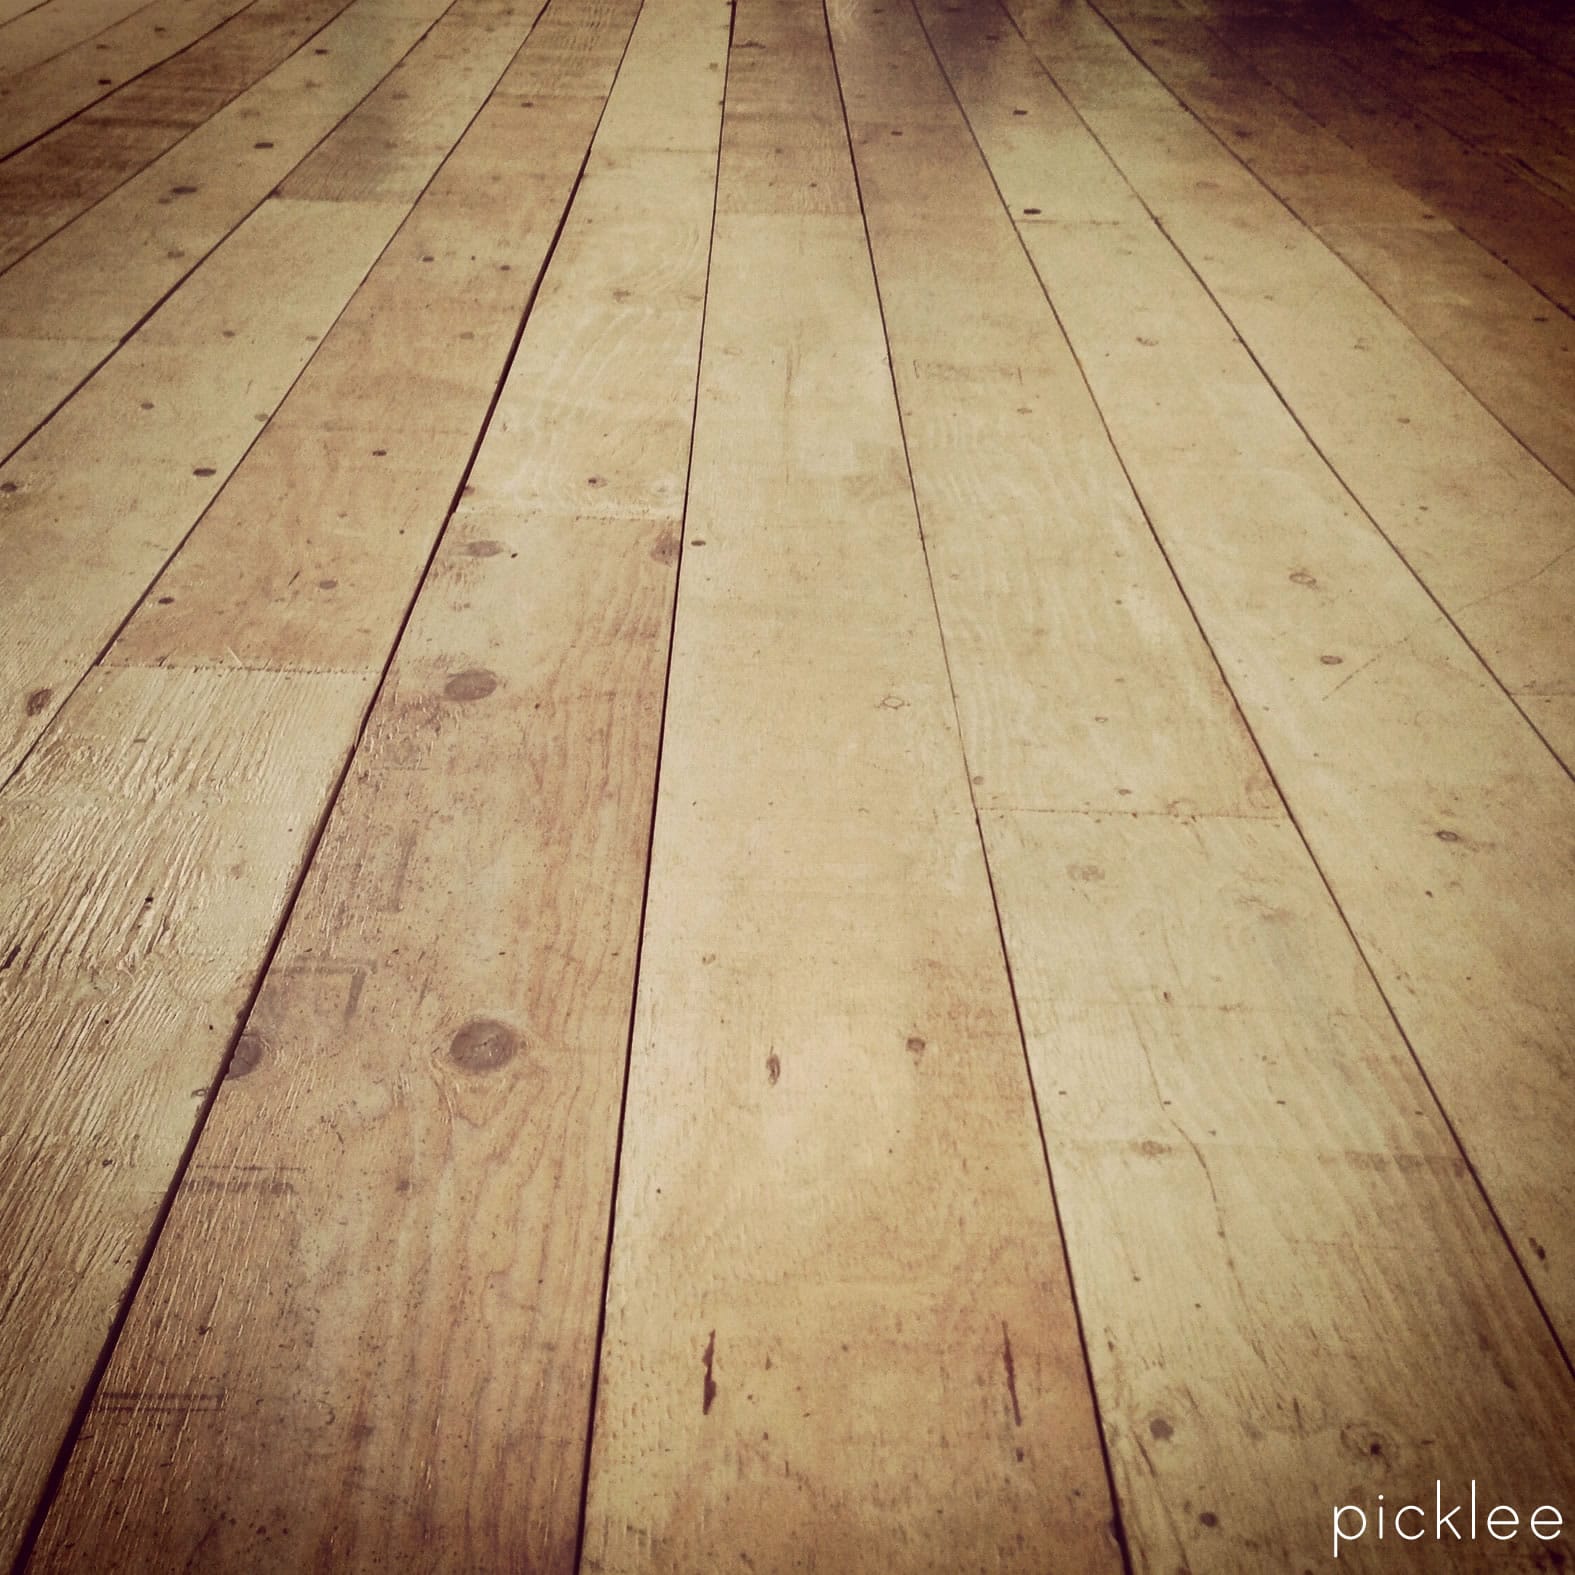
Brenden and I laid out the boards in a pattern that worked - Remember we had different lengths to work with to give more of  random look. Then Hero came behind us and nailed them in with his awesome air nail gun. Totally made this project a piece of cake.


It is a little hard to tell, but we used small pieces of a cereal box for the spacers between the boards. Hardly any space at all - Just enough so you can tell there are individual boards, but not so much that a gallon of milk will pour through.


After nailing everything down, it was time to finish sand. The plywood we bought was a finished plywood, meaning it was pretty smooth the way it was. But it needed a once over - I had visions of my grandkiddos crawling along the floor and getting slivers in their chubby little knees. Not a good vision.

Hero sands with one hand and vacuums with the other at the same time. Really, really cut down on the sawdust flying around.


Ready for the next step!

Looking good Laine. Looking real good. (A reference from the movie, Better Off Dead with John Cusak. Classic eighties movie.)


Stain!

We have a lighter oak floor in the rest of the house so we were trying to stay clear of the "matched" look. It would be pretty much impossible to match it completely, so we made sure it did not even look like we were trying. Hence the 6" wide boards (The oak floor has 2 1/2" wide boards). And we chose a medium-dark stain for the kitchen. Should be a terrific contrast to all the white going on in there.


The thing with working on floors is you get to spend lots of time on your knees. But I have found that it can  be a great workout for your butt - Mine was sore the next day.


Look at that! 

Okay, maybe the vision will happen.


Wow. All we can say is wow.


After the stain dried (and totally stunk up our house) we are still not done. 

Next up is polyurethane.

Visions sure have a lot of steps.

Thursday, July 18, 2013

Kitchen Floor Part One

We have craziness going on over here!


Have you ever planned a party or were expecting company and felt the need to do a few things around the house before guests arrived? We do that. We will make a list of things we would like to have happen before "X" date.
And that is what happened here - We were expecting our terrific friends from half way across the country to come for a short visit in a few weeks and decided we would like to get the kitchen floor done. Nothing like a deadline to motivate!

(Sadly our friends had to change their plans, but we had already started by the time we got the bad news. I tried to entice them with a private kitchen floor reveal, but they had to decline. Rats.)

So, while I was out of town visiting another terrific friend, Hero and company (Brenden, Colin and Liam) got out power tools, crow bars, pliers, face masks, the shop vac and other assorted tools of destruction to tackle the kitchen floor.

A note here - Liam has been baffled by our desire to re-do this floor. He thought the one we had was just great. That kid. But he still got in on the demolition.


They started by covering the cupboards and the rest of the house to keep the dust contained. 

First step - Cut through several layers of old floor. Note the vacuum - Good idea.


First peek underneath what we have been walking on for the last year.

(Actually, we saw this before when we started the kitchen project. Now we are seeing lots more of it.)


Hero got a great new floor scraping tool to help with this project. I totally understand any excuse to get a new tool.


Everyone wants a turn with it. The thing with Hero is that he makes everything look so easy and fun. We usually find out it is not fun or easy. Good thing things are fun and easy for him!


Where is this kid's parent? Really? No shoes? Guess they were just too excited to get started to notice he was walking around the nail, splinter and staple infested kitchen.

Good thing his tetanus booster is up to date.


One not so attractive floor yields to an even less attractive floor.


The top two layers are backed with a wooden subfloor, which totally bumped this floor up about 27 inches.

 We felt really tall in our kitchen.


And the bottom layer of floor. The photos really don't do it justice. Trust me when I tell you this is not pretty. It has kind of an avocado green tint to it. But under some trim where the floor was perfectly preserved, it was mostly gray and white - much cleaner and brighter.


We decided to leave this layer as we were not sure what the material was and didn't want to chance stirring up any toxic dust.


(This is a better shot of the color.)

Because we were working with the remains of two floors, we counted approximately 25,694 staples removed.


Colin did get some shoes on by this point. Would not want one of these bad boys in the foot.


A fraction of what we excavated.


Liam ran the metal yardstick across the floor to find any staples we may have missed. You would think with four people scouting for them, we would have been good. Not so much. We found a handful more. They were impossible to see on the camouflage floor. 


We were totally inspired for this project by this terrific looking floor. 

This is not fancy, expensive hard wood flooring. It's not even aged, rescued barn wood planks.

It is, in fact, plywood. Really.

We read lots of tutorials and comments on how it holds ups. We were impressed.

So we priced it out. Coming in at about $250 for the whole thing, we totally went for it.


We had 4'x8' sheets cut into 6" strips the long way at Lowes'. So great! Saved us a ton of work and they did a terrific job. Hero cut them into different lengths so they would be staggered and look more 
farm house-y/cottage-y.


At this point we lost some of our manual labor (we were not complaining - they worked hard), so Brenden and I laid out the boards while Hero followed behind us with the nail gun. We stayed up way too late to get most of it installed that day. 

See what I mean about crazy!

Tuesday, July 16, 2013

Holy Cow!


Look at this!


I came home from a visit with my friend on Saturday and this is what my household of boys was doing.

This is our kitchen floor!

I will get the update out soon. 

Let me just say it is looking totally awesome!

Wednesday, July 3, 2013

A Fun Thing In the Kitchen

I know you know that we are in love with the way our kitchen is coming together.

We went from this:


To this:


Yep - It is really getting there.

This kitchen just gets better and better each day. And not only because it is so much more functional and fabulous looking.

But because is feels good.

Can a room have a feeling? Sure. 

It can feel closed in, dark, cramped, disorganized - Not so good.

Or it can feel open, light and bright, orderly - Good.

Something else that makes a room feel good is who you share it with. And the kinds of things you do there.

We are choosing good.

See what we did?

It started with this:


And this sweet book:


And this terrific girl:


Lauren so graciously agreed to help me make these delicious treats for a good friend's family luncheon. She has made hundreds of these little french cookies. 

We had great time whipping these babies up.


Making macarons is surprisingly easy. Really. It is basically a type of meringue that is piped onto baking sheets, baked, cooled, then filled with a yummy filling.


The trick (and not that much of a trick) is once it is is whipped up that you don't handle it so much that you lose all the fluffiness you just whipped into the batter.


These are lemon. Yum.

Piping makes you feel like a pro.


These are chocolate. Yum again.


Once they are cooled fill them up with goodness - That is another name for filling.


See those blue ones? Blueberry cheesecake. Yum for a third time.


Holy cow. We had a pretty difficult time not eating all of them.

I love the fun things we do and the memories that we are creating in our little house. Of course, we made lots of awesome memories in our big house, too, but bigger does not always mean better. We are happy to find that we are just as fun and happy and comfortable and all kinds of good things in our cozy home as we were in the big house.

Next time we make macarons:

Macaroon Ice Cream Sandwiches


Ice cream filled!

Yum for the fourth time.